本课对应源文件下载链接:
https://download.csdn.net/download/XiBuQiuChong/88680079
这节课我们开始利用ffmpeg和opencv来实现一个rtmp播放器。播放器的最基本功能其实就两个:显示画面和播放声音。在实现这两个功能前,我们需要先用ffmpeg连接到rtmp服务器,当然也可以打开一个文件。
1.压缩备份上节课工程文件夹为demo.rar,并修改工程文件夹demo为demo2,及时备份源文件并在原基础上继续迭代开发是一种好习惯。
2.打开fmlp.cpp,修改其中的删除原来init函数中的代码,并加入以下代码:
runFFmpegHandle = CreateThread(NULL, 0, runFFmpegThreadProc, (LPVOID)this, 0, NULL);如果把MFC对话框相关代码看作主线程函数的话,上述代码的作用是新建一个线程,并在新的线程中执行与ffmpeg及opencv有关的操作。这样做的好处就是实现了“各司其责”,MFC所在的主线程主要用来处理UI(界面)方面的工作,ffmpeg及opencv子线程主要用来处理网络连接、图形处理等方面的工作,互不影响,简洁高效。
3.因为我们需要连接rtmp服务器,所以我们需要在fmlp.h中增加一个字符串类型的rtmp地址;另外还需要定义子线程句柄及相关函数:
CString inRtmpURL;
HANDLE runFFmpegHandle;
static DWORD WINAPI runFFmpegThreadProc(LPVOID lpParam);
int runFFmpeg();
BOOL isRunning = false;

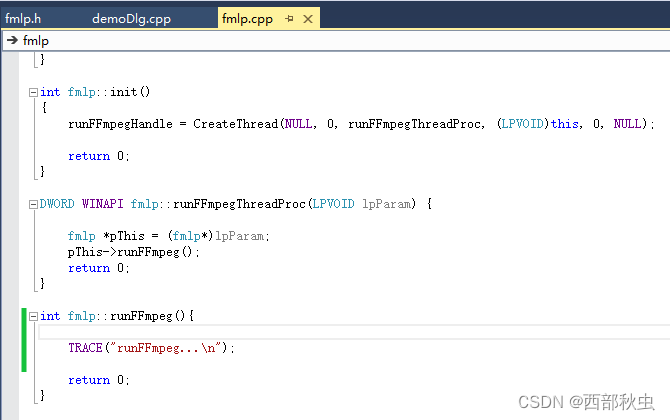
4.在fmlp.cpp中加入对应的函数,调试输出“runFFmpeg...”则表示子线程正常运行。
5.FFmpeg作为开源的跨平台音视频处理工具,提供了丰富的API来处理音视频文件。下面是利用FFmpeg API播放rtmp或rtsp流或文件的工作流程:
(1)打开输入文件:使用avformat_open_input函数打开输入文件,该函数会自动检测文件格式并初始化相应的解码器。
(2)查找流信息:使用avformat_find_stream_info函数查找输入文件中的音视频流信息,包括编码格式、帧率、分辨率等。
(3)查找解码器:根据流信息中的编码格式,使用avcodec_find_decoder函数查找相应的解码器。
(4)打开解码器:使用avcodec_open2函数打开解码器,准备解码音视频数据。
(5)取数据包:使用av_read_frame函数读取音视频数据包,每个数据包包含一个或多个音视频帧。
(6)解码数据包:对于音频数据包,使用avcodec_send_packet和avcodec_receive_frame函数解码。
(7)处解码后的数据:对于音频数据,可以进行音频处理,如音频播放、音频重采样等;对于视频数据,可以进行视频处理,如视频叠加水印、视频滤镜效果等。
(8)编码数据包:对于音频数据,可以使用avcodec_send_frame和avcodec_receive_packet函数进行编码。
(9)写入数据包:使用av_write_frame函数将编码后的数据包写入输出文件或使用av_interleaved_write_frame函数将编码后的数据包推送到rmtp流服务器。
(10)关闭解码器和输入文件:使用avcodec_close函数关闭解码器,使用avformat_close_input函数关闭输入文件。
(11)释放资源:使用avformat_free_context函数释放AVFormatContext结构体和相关资源。
根据上述流程,我们就可以在runFFmpeg函数中正式开始我们的工作了:
int fmlp::runFFmpeg(){

	//返回值
	int ret;
	//rtmp地址,也可以是本地文件
	const char *inFileName = "rtmp://192.168.0.100/vod/sample.mp4";

	//输入文件上下文结构体
	AVFormatContext *inFormatCtx = NULL;

	//视频解码相关
	int videoIndex = -1;
	AVCodec *vDecodec;
	AVCodecContext *vDecodeCtx = NULL;
	//图像转换上下文结构体
	struct SwsContext* bgrSwsCtx = NULL;
	struct SwsContext* yuvSwsCtx = NULL;
	//图像数据数组
	uint8_t* bgrBuff = NULL;
	//读取的数据包
	AVPacket normalPkt;
	//Mat对象
	cv::Mat srcMat;


	//开始时间和当前时间
	int64_t startTime = 0;
	int64_t currentTime = 0;

	//FFmpeg初始化
	av_register_all();
	avcodec_register_all();
	avformat_network_init();


	inFormatCtx = avformat_alloc_context();
	AVDictionary* options = NULL;
	av_dict_set(&options, "buffer_size", "10240", 0);
	av_dict_set(&options, "max_delay", "1000", 0);
	av_dict_set(&options, "max_analyze_duration", "10000", 0);
	av_dict_set(&options, "probesize", "20480", 0);
	av_dict_set(&options, "stimeout", "5000", 0);
	av_dict_set(&options, "listen_time", "5000", 0);
	av_dict_set(&options, "initial_timeout", "5000", 0);
	av_dict_set(&options, "preset", "ultrafast", 0);
	av_dict_set(&options, "tune", "zerolatency", 0);

	if ((ret = avformat_open_input(&inFormatCtx, inFileName, 0, &options)) < 0)
	{
		TRACE("无法打开输入流.\n");
		return -1;
	}

	if (ret == 0){
		isRunning = true;
	}
	else{
		isRunning = false;
	}

	if ((ret = avformat_find_stream_info(inFormatCtx, 0)) < 0)
	{
		TRACE("查找输入流信息失败.\n");
		return -1;
	}
	//获取音视频流通道ID
	for (int i = 0; i < inFormatCtx->nb_streams; i++){

		if (inFormatCtx->streams[i]->codecpar->codec_type == AVMEDIA_TYPE_VIDEO)
		{
			videoIndex = i;
		}

	}

	TRACE("视频流通道索引%d\n", videoIndex);
	//初始化并打开视频解码器
	vDecodec = avcodec_find_decoder(inFormatCtx->streams[videoIndex]->codecpar->codec_id);
	vDecodeCtx = avcodec_alloc_context3(vDecodec);
	avcodec_parameters_to_context(vDecodeCtx, inFormatCtx->streams[videoIndex]->codecpar);
	avcodec_open2(vDecodeCtx, vDecodec, 0);

	av_dump_format(inFormatCtx, 0, inFileName, 0);

	//解码后的原始视频帧
	AVFrame *deVideoFrame = av_frame_alloc();
	//缩放后的视频帧
	AVFrame bgrFrame = { 0 };
	bgrFrame.width = 960;
	bgrFrame.height = 540;
	bgrFrame.format = AV_PIX_FMT_BGR24;
	int bgrFrameSize = av_image_get_buffer_size((AVPixelFormat)bgrFrame.format, bgrFrame.width, bgrFrame.height, 1);
	bgrBuff = (uint8_t*)av_malloc(bgrFrameSize);
	av_image_fill_arrays(bgrFrame.data, bgrFrame.linesize, bgrBuff, (AVPixelFormat)bgrFrame.format, bgrFrame.width, bgrFrame.height, 1);
	//获取图像转换上下文
	bgrSwsCtx = sws_getContext(vDecodeCtx->width, vDecodeCtx->height, vDecodeCtx->pix_fmt, bgrFrame.width, bgrFrame.height, (AVPixelFormat)bgrFrame.format, SWS_BICUBIC, NULL, NULL, NULL);

	//获取开始时间
	startTime = av_gettime();
	while (isRunning)
	{
		ret = av_read_frame(inFormatCtx, &normalPkt);
		if (ret < 0){
			break;
		}

		//当数据包时间快于当前时间则延当延时
		currentTime = (av_gettime() - startTime) / 1000;
		if (normalPkt.pts > currentTime){
			Sleep(normalPkt.pts - currentTime);
		}

		if (normalPkt.stream_index == videoIndex)
		{
			ret = avcodec_send_packet(vDecodeCtx, &normalPkt);
			ret = avcodec_receive_frame(vDecodeCtx, deVideoFrame);
			av_packet_unref(&normalPkt);
			ret = sws_scale(bgrSwsCtx, (const uint8_t* const*)deVideoFrame->data, deVideoFrame->linesize, 0, deVideoFrame->height, bgrFrame.data, bgrFrame.linesize);
			srcMat = cv::Mat(bgrFrame.height, bgrFrame.width, CV_8UC3, bgrFrame.data[0]);
			imshow("viceo", srcMat);
			cv::waitKey(10);
			//mainDlg->drawMatOfPlay(srcMat);
			//av_frame_unref(deVideoFrame);
		}
	}


	av_dict_free(&options);
	avformat_close_input(&inFormatCtx);
	isRunning = false;
	return 0;
}
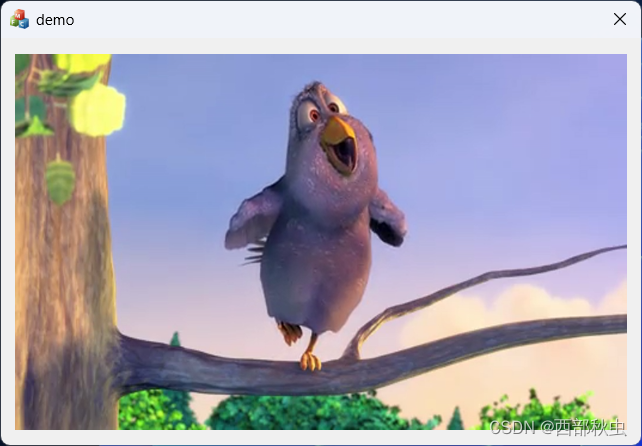
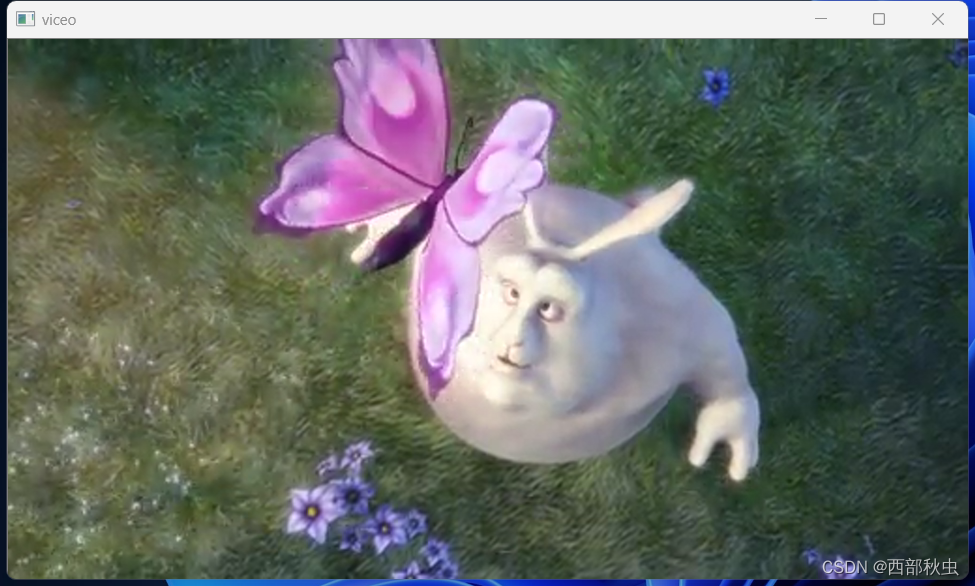
6.先不用管那么多,先运行起来看看效果吧。如果能弹出窗口显示图像则表示连接rtmp服务器成功并成功拿到视频数据。
7.上面的视频显示是利用openCV的内置函数来imshow来实现的,会弹出一个新的窗口,这样会显得会怪异。为了让视频显示在MFC对话框中,需要先在对话框中添加一个名为IDC_playPic的Picture Control 控件,并加入显示函数:
void CdemoDlg::drawMatOfPlay(cv::Mat &img)
{
	CDC *playCDC;
	CRect rectForPlay;
	cv::Mat scaleMatForPlay;
	playCDC = myWnd->GetDlgItem(IDC_playPic)->GetDC();
	myWnd->GetDlgItem(IDC_playPic)->GetClientRect(&rectForPlay);
	cv::resize(img, scaleMatForPlay, cv::Size(rectForPlay.Width(), rectForPlay.Height()));
	switch (scaleMatForPlay.channels())
	{
	case 1:
		cv::cvtColor(scaleMatForPlay, scaleMatForPlay, CV_GRAY2BGRA);
		break;
	case 3:
		cv::cvtColor(scaleMatForPlay, scaleMatForPlay, CV_BGR2BGRA);
		break;
	default:
		break;
	}

	int pixelBytes = scaleMatForPlay.channels()*(scaleMatForPlay.depth() + 1);

	BITMAPINFO bitInfo;
	bitInfo.bmiHeader.biBitCount = 8 * pixelBytes;
	bitInfo.bmiHeader.biWidth = scaleMatForPlay.cols;
	bitInfo.bmiHeader.biHeight = -scaleMatForPlay.rows;
	bitInfo.bmiHeader.biPlanes = 1;
	bitInfo.bmiHeader.biSize = sizeof(BITMAPINFOHEADER);
	bitInfo.bmiHeader.biCompression = BI_RGB;
	bitInfo.bmiHeader.biClrImportant = 0;
	bitInfo.bmiHeader.biClrUsed = 0;
	bitInfo.bmiHeader.biSizeImage = 0;
	bitInfo.bmiHeader.biXPelsPerMeter = 0;
	bitInfo.bmiHeader.biYPelsPerMeter = 0;
	StretchDIBits(
		playCDC->GetSafeHdc(),
		0, 0, rectForPlay.Width(), rectForPlay.Height(),
		0, 0, rectForPlay.Width(), rectForPlay.Height(),
		scaleMatForPlay.data,
		&bitInfo,
		DIB_RGB_COLORS,
		SRCCOPY
		);
	ReleaseDC(playCDC);
}
8.在fmlp.cpp中调用显示函数:
//imshow("viceo", srcMat);
//cv::waitKey(10);
mainDlg->drawMatOfPlay(srcMat);
av_frame_unref(deVideoFrame);
再次运行,效果立现: